$65
What:
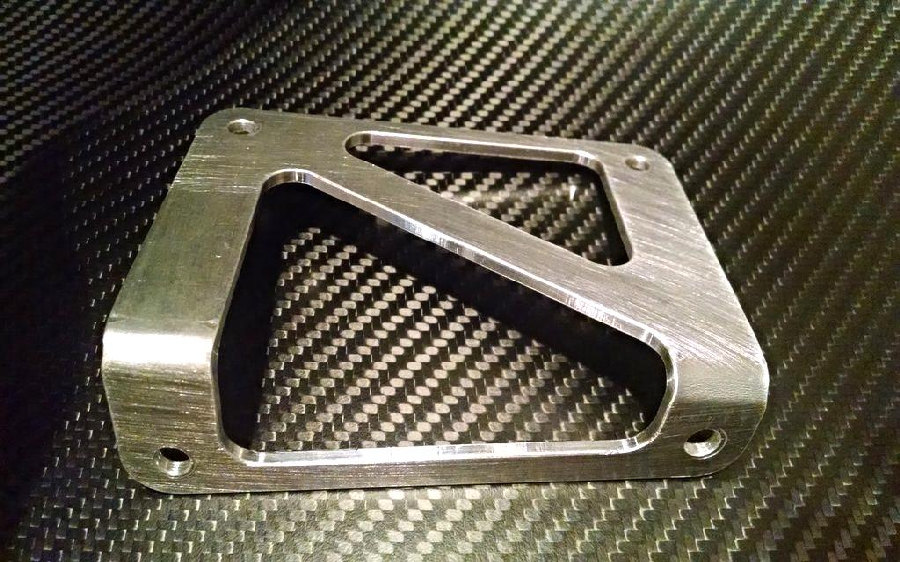
Aluminum brackets, rivnuts, and miscellaneous hardware required to mount a type 100 heat exchanger to the 818 radiator subframe.
Why:
Individuals choosing to move to an AWIC setup need to mount a heat exchanger up front. These brackets are the same brackets that come packaged in the AWIC setup available from Zero Decibel. For those wishing to make their own setup or use a different core but still use the type100 heat exchanger these brackets are an easy mounting solution.
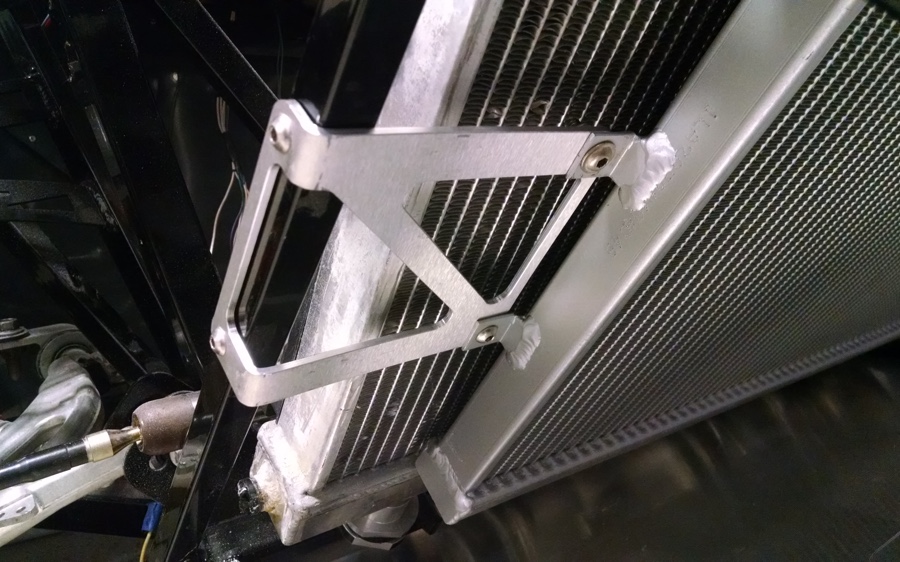
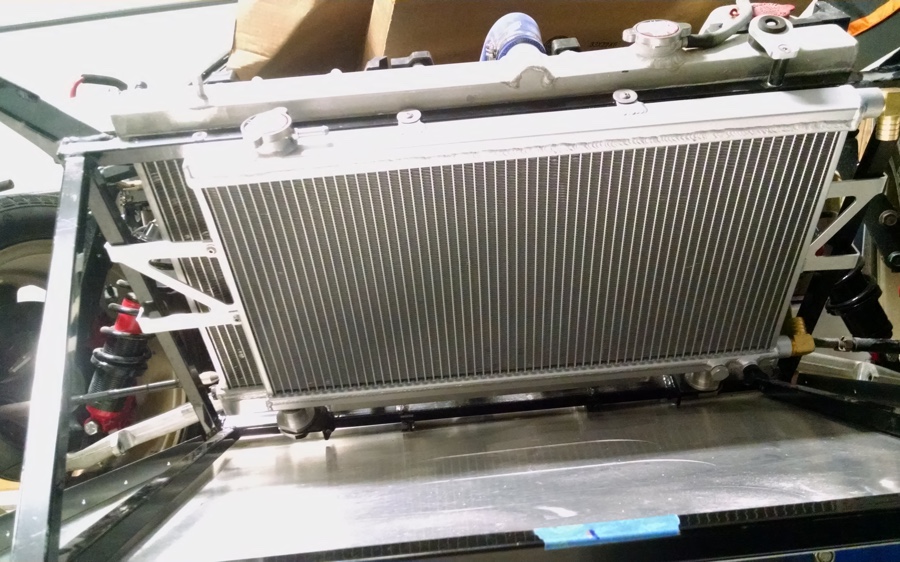
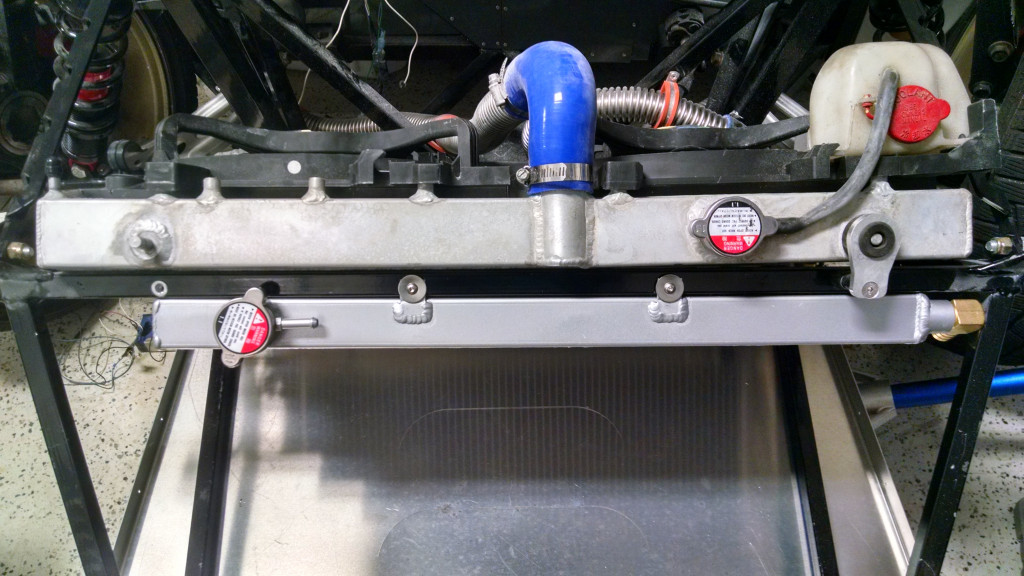
These particular brackets were designed to offset the radiator to one side. Using 90 degree fittings the water lines can routed with a straight shot right between the radiator and the subframe to prevent kinking water lines. The top of the heat exchanger sits flush with the subframe so that the water fill cap sits above the frame and is removable without unbolting the brackets. Minor trimming of the driver side inner bumper behind the headlight is required. The sheet metal on the coupe style front end will require minor trimming. Original style front ends do not require trimming.
Shipping
USPS Priority
Includes
Laser cut brackets for passenger and driver side (non interchangeable)
Stainless screws, washers, and locknuts for mounting
Coated rivnuts
EPDM foam to cushion and seal top of heat exchanger to subframe
Installation Instructions:
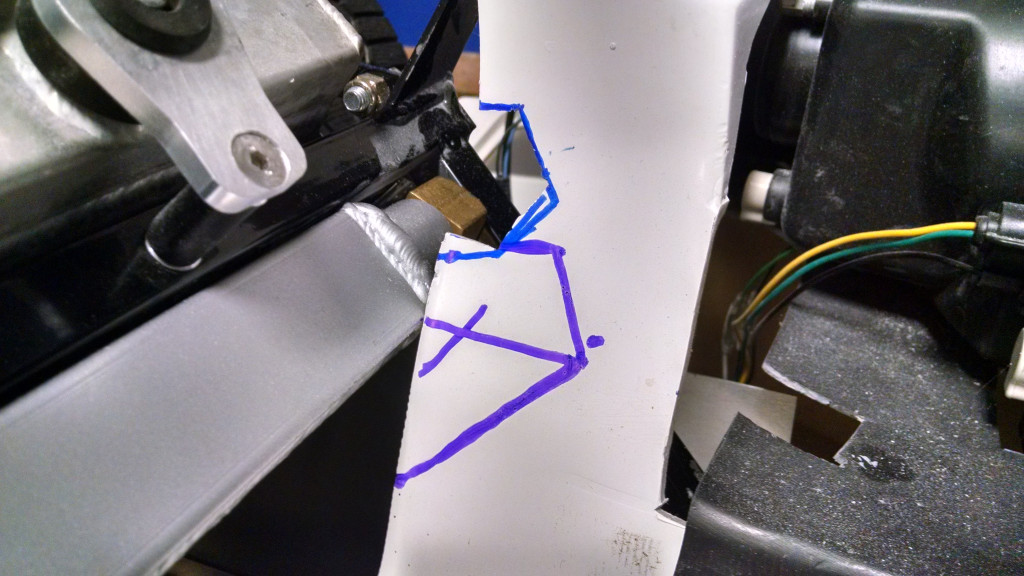
Apply the foam to the top backside of the HE where it will touch the top rail of the subframe. Bolt the brackets to the HE with the longer bracket on the passenger side. The bent arms should face towards the rear of the car. The bent arm is angled on the edge. The shorter edge should be on the top. If it is not, then the bracket is turned around wrong or on the incorrect side. The overflow cap on the HE should be on the passenger side. Set the top of the HE flush with the top of the subframe and the angled edge of the brackets flush with the rear of the side rails of the subframe. Clamp the brackets in place and mark the locations of the four holes for the 1/4-20 rivnuts. Remove the HE and brackets, drill holes for the rivnuts, and install the rivet nuts. Replace the HE this time bolting the brackets in place. Using a rubber mallet, flatten the two top mounting tabs welded to the HE. Mark the hole locations, remove the HE and brackets and drill the two new holes to install the 10-32 rivnuts. Install the 90 deg fittings and replace the HE and brackets. Use the fender washers and 10-32 screws to secure the top tabs. If these brackets are used on the HE supplied with VCP’s HE a spacer is needed to utilize the top two mounting tabs (user supplied) because the filler neck is different