


$225 (Discontinued)
What:
A multipart kit designed to adapt the SW20 MR2 shifter into a purpose built, custom, 818 shifter
Why:
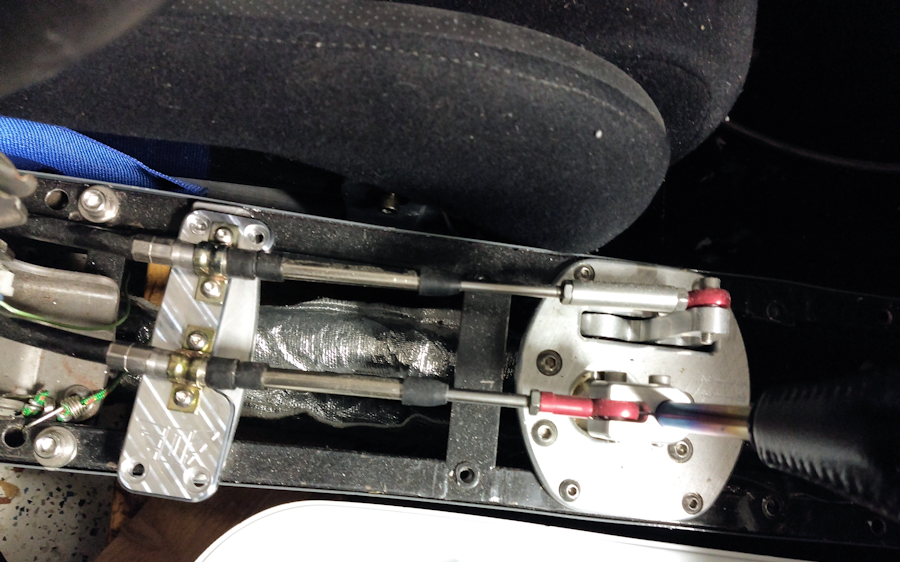
The SW20 MR2 shifter is one of the few shifters that allows you to run the shifter cables straight back to the transmission in a rear engine/transmission car. The OEM shifter plate is rather ugly, generally rusty after all these years, and not designed to fit in the 818. Builders who decided to use the SW20 shifter need to make their own adapter plates, figure out how to attach cables to the bell crank, and mount the cables to the chassis. This kit allows you extract the functional guts and swap them over to a purpose built base plate, cable clamping plate, turnbuckle adapter for easy adjustments, and a fancy looking bell crank to jazz it all up and make cable attachment easier.
Combine this with the bellcrank for a setup with the shortest cables, fewest bends, positive engagement feel, and a pretty slick looking setup.
Notes:
- Builder must supply their own SW20 MR2 shifter (1989-1999) or AW11 MR2 shifter (1984-1989)
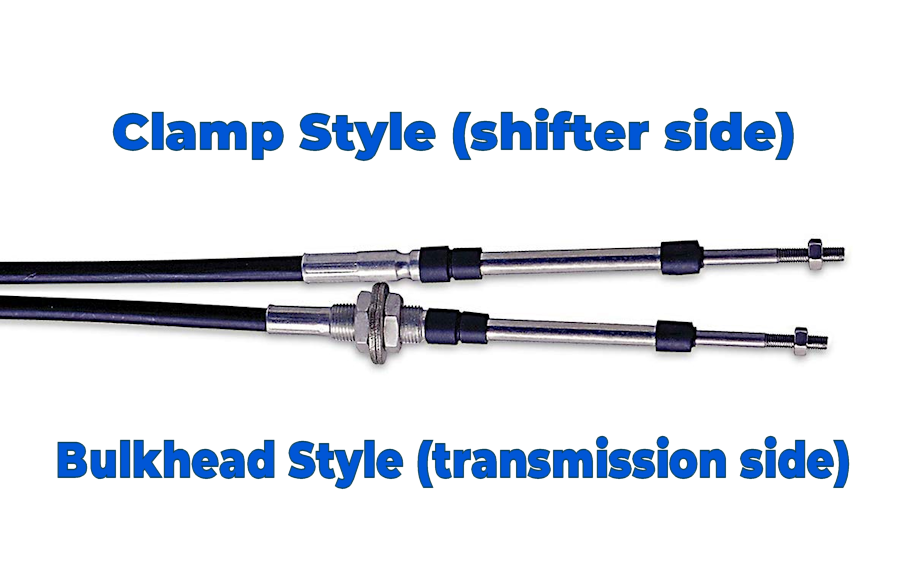
- Cables are not included. Depending on your routing, you can use 7′ or 8′ cables with in conjunction with the bellcrank setup. Cables must be a clamp type mount on one end and a bulkhead mount on the opposite end. Threaded cable ends need to be 1/4-28 RH threads. We recommend Seastar Solutions Teleflex 4300 series cables part numbers CCX43008 (8ft) or TELCCX43007 (7ft). I went around the driver side of the engine and have my shifter mounted forward a bit. It was 1″ too far to use 7′ cables, so I used 8′.
Shipping:
$15, in the Continental US
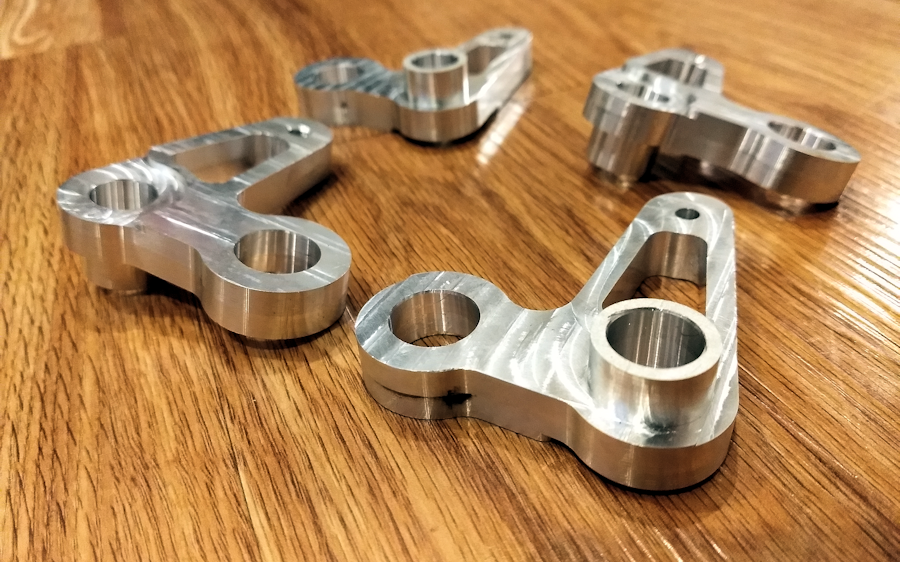
Includes:
Base plate
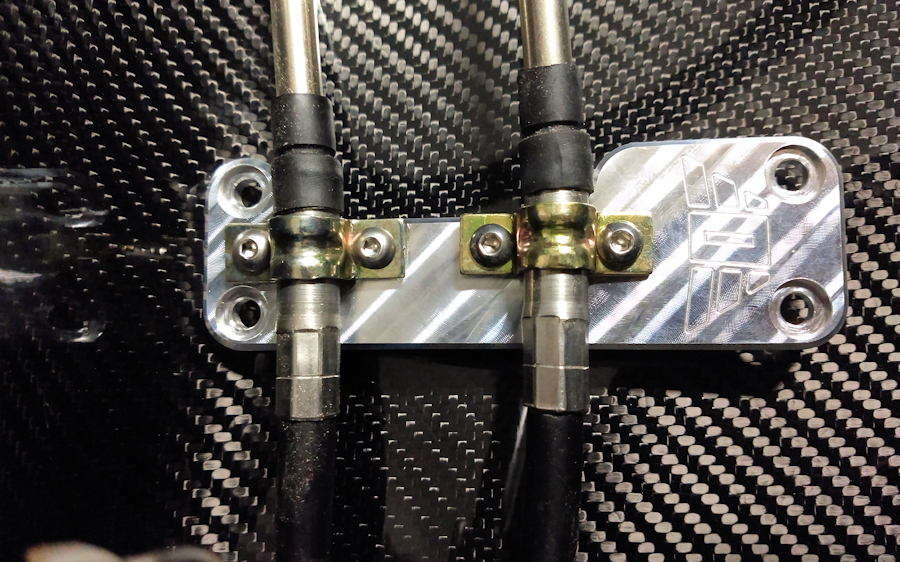
Cable clamping plate
Bell crank
RH/LH Coupler
Red anodized aluminum rod ends
Plated steel cable U-clamps
Stainless hardware and nuts
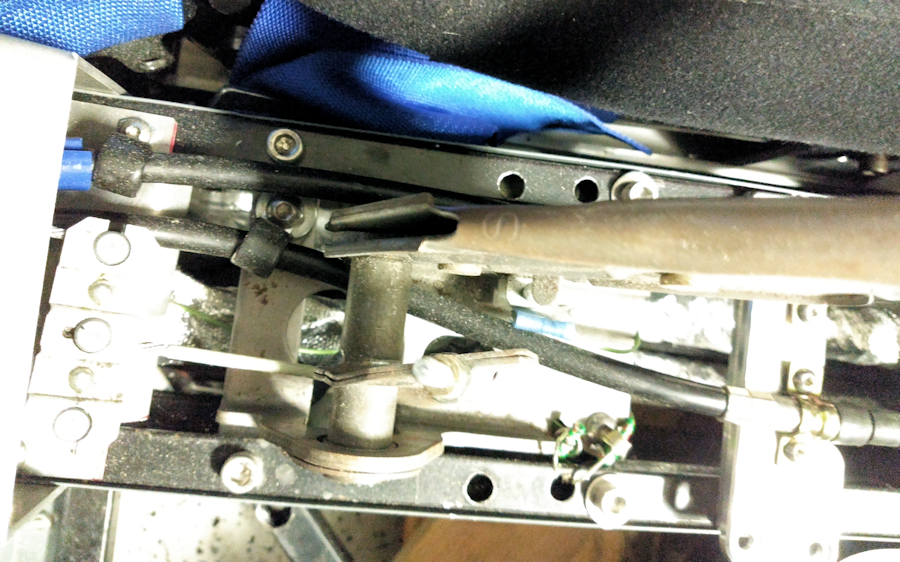
Installation Instructions:
Disassemble the shifter completely for cleaning. Remove the plastic bushings from the OEM steel bellcrank and press them into the aluminum bell crank. Apply clean grease to the plastic cup, bushings, and the plastic end cap on the shift lever. Insert the shift lever down through the top of the base plate. Reinstall the plastic cup, metal supports, and bell crank all at once. If you don’t do it at the same time before bolting it together you won’t be able to install the bell crank. The cables clamp down onto the clamping plate with the supplied U clamps. The u clamps do not bottom out by design to ensure the cable is always held securely. Tighten the U clamp evenly left to right to ensure even pressure.